Ready to wrangle some data directly in SQL Server? Today, we're diving into how to enter and edit records right in your tables using SQL Server Management Studio (SSMS). You'll see how to add new records, handle those infamous required fields, make sense of identity IDs (autonumbers), and even import sample data from Access - using Excel as your trusty go-between. All of this is super handy for developers and serious Access users who want a real-world set of data to play with as we build out our queries.
If you've ever made tables in Access and fiddled with data directly in them, you already get the vibe. While your users will (hopefully) never touch the backend tables, as a developer you sometimes need to sneak in behind the scenes - add a test record, make an edit, or just seed a few rows so things aren't completely empty. Being able to enter data straight into SQL Server tables through SSMS lets you do all this quickly.
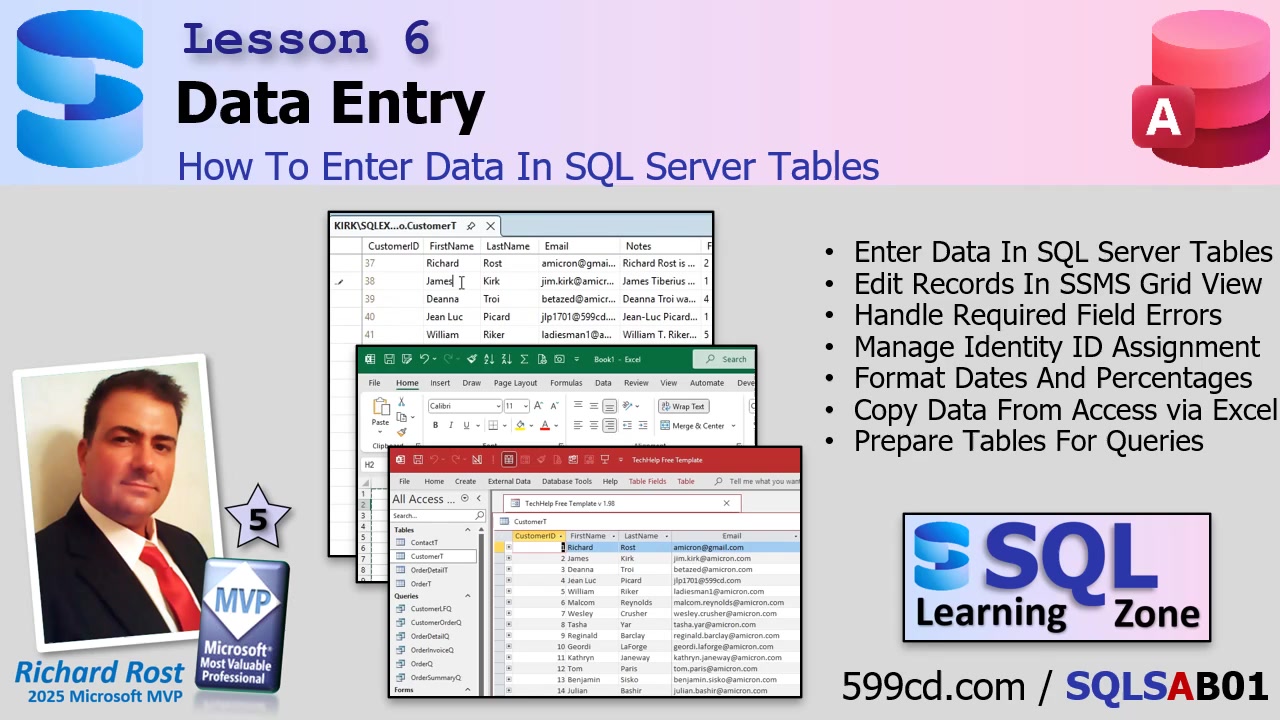
The most straightforward way to enter data in SSMS is to right-click your table in the Object Explorer and choose "Edit Top 200 Rows." Why 200? Because Microsoft picked a number, and that's what you get. This opens a grid very reminiscent of Access datasheet view, putting you in edit mode so you can start typing directly into cells.
Here's how it works: Columns that are locked (like an auto-numbered primary key) can't be edited, but move over to fields like "FirstName" or "LastName" and type away. One thing to notice - unlike Access, where the autonumber appears as soon as you start typing, SQL Server assigns its identity ID only after you save the record (by moving off the row). At first this feels a little weird, but you get used to it - and it's important to understand if you're coming from Access, because it can affect how you write your code, especially if you're inserting related child records that need that ID right away.
While you're editing a row, you'll see a little pencil icon appear (just like in Access), which means the record is "dirty" and hasn't been saved yet. There's also a red exclamation point - don't panic, it's just SSMS's way of saying changes haven't been written yet. If you try to leave a required field blank (like "LastName"), you'll get an error. SQL Server's error messages are rarely warm and fuzzy, so actually read what it says. Fill in your missing data, and move off the row - the warning goes away, data is saved, and your new identity ID is assigned.
Sometimes, you might see a message that the record was saved, but a problem occurred while retrieving the data back. Relax - your record has been saved, SSMS just got confused. Just close and reopen the grid, and your data (and shiny new ID) will be there.
When entering certain types of data, like percentages, you'll want to stick to the standards most Access developers use: enter 0.1 for 10%, 0.5 for 50%, and so on. This keeps your calculations easy and consistent, and generally saves you from having to divide or multiply by 100 in your queries later. And yes - things like formatting (especially for dates) might look goofy in SSMS. You might see a big ugly datetime with seconds and milliseconds, but that's just how SQL Server wants to show it. Don't sweat it - you'll handle the pretty formatting in Access or in your reports later.
For Boolean fields, even though SSMS will display "True" and "False," you should get in the habit of entering 1 for true and 0 for false. SQL Server likes it that way, and you'll avoid those oddball issues that pop up when you try to insert other values. Access is more forgiving; SQL Server likes to keep things black and white - or, well, ones and zeros.
Let's talk about importing data. If you have a set of sample data in Access (like from my TechHelp Free Template), an easy way to bring it into SQL Server is: copy it to Excel, tidy it up, and then paste it into your SSMS table grid. This works nicely because you can rearrange, add, or delete columns in Excel so everything lines up perfectly with your SQL table's structure.
For example, if you have extra columns in your Access export (like "Phone" when your SQL table doesn't have a phone field), just delete them in Excel. Want to skip pasting IDs so SQL can assign them? Delete those values as well. Make sure your columns match the order of your SQL table - don't be afraid to cut and insert columns as needed to make everything fit. If your numbers (like credit limits) copied over as dollar amounts, remove the pesky "$" - SQL Server does not like those. Format dates as plain short dates. Remove the header row, copy your prepped data, click in the first row in SSMS, and paste. Done! If you get errors, double-check your formatting - almost always, it's a stray symbol, wrong column order, or a non-matching data type.
Keep in mind, this method is for sample or test data and not for production loads. It's the perfect way to get a handful of records into your table so you have something to work with when writing queries, forms, or reports. Trust me, testing queries on empty tables is no fun.
And there you have it! You now know how to enter and edit data right in your SQL Server tables using SSMS, manage identity IDs, and import sample data from Access via Excel. This hands-on knowledge makes it much easier to develop, test, and troubleshoot as you build your application.
If you need a deeper walk-through (or just want to see it in action), check out the video above. Parts 2 and 3 of the course are waiting for you on my site, by the way - and don't forget, Silver Members and up get a free class every month!
Live long and prosper,
RR
No comments:
Post a Comment