Have you ever put something away somewhere safe, only to discover six months later that it is apparently safe from you too? Whether it is a book in your office, a tape measure in the garage, school equipment, or a box of Christmas decorations in storage, the problem is the same: you know you own it, but you have no idea where it ended up. A simple Access database can solve that problem nicely, as long as you organize locations in a flexible way from the start.
The big mistake people often make is creating a separate table for every kind of storage object. They make a Bookcase table, a Shelf table, a Cabinet table, a Drawer table, a StorageRoom table, and before long the database has turned into a filing cabinet full of filing cabinets. Instead, think in terms of a general location hierarchy. The furniture can change, but the structure of the data does not have to.
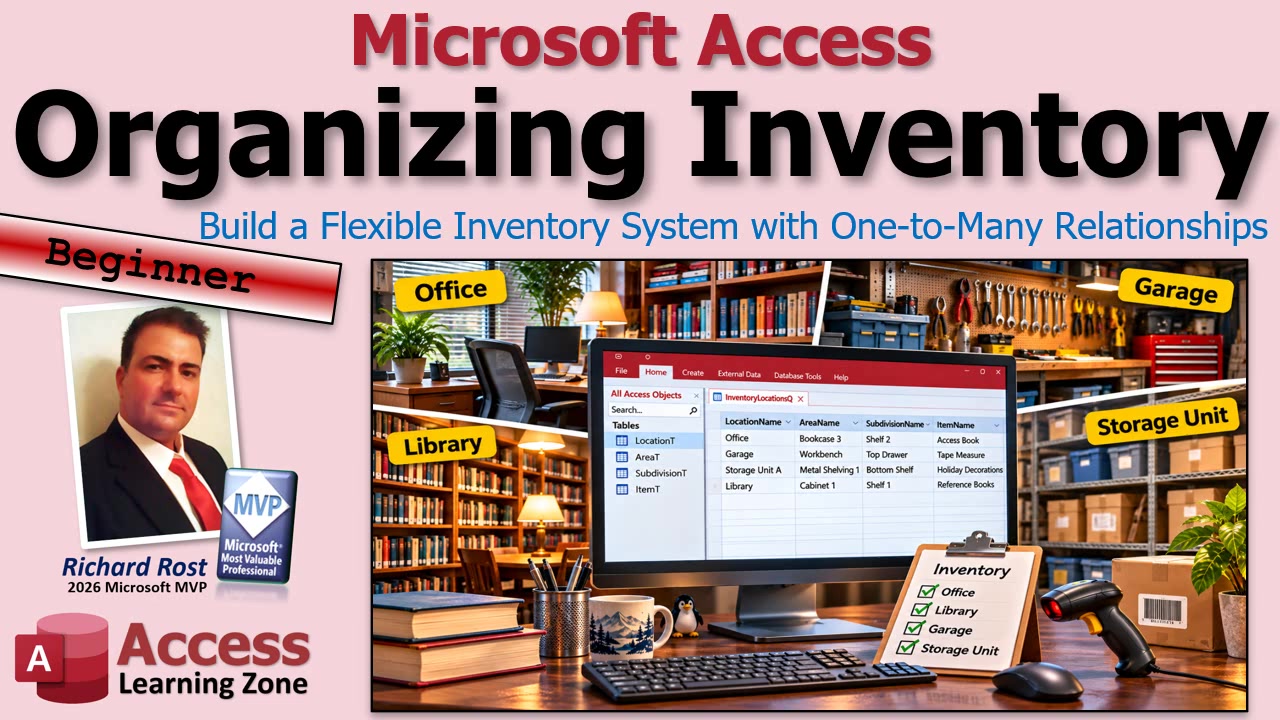
A practical beginner-friendly design uses four levels: Location, Area, Subdivision, and Item. These names are deliberately generic. They can describe almost anything without forcing you to redesign your database every time you buy a new cabinet.
For example, suppose you have an Access book in your office. The office is the location. Bookcase 3 is an area inside that location. Shelf 2 is a subdivision inside that bookcase. Finally, the book itself is the item.
The same structure works in completely different situations. Your garage might be the location, your workbench the area, and the top drawer the subdivision. Your tape measure is then the item. In a storage unit, the location could be Storage Unit A, the area could be Metal Shelving 1, and the subdivision could be the bottom shelf. The item might be a box of holiday decorations.
You do not need a special Garage table, a Workbench table, or a Drawer table. That is the beauty of using general names. The database does not care whether an area is a bookcase, desk, shelf rack, filing cabinet, tool chest, or an alien phaser cabinet. It is simply an area that belongs to a location.
The table structure is straightforward. Start with a LocationT table containing a LocationID field and a LocationName field. LocationID should be an AutoNumber primary key. LocationName can hold values such as Office, Garage, Storage Unit A, Broom Closet, or Building 2 Room 104.
Avoid calling your field simply Name. Access will let you do it, but Name is one of those field names that can cause confusion later because it is used by Access and VBA in other contexts. The same goes for other reserved or commonly used words such as Date. Use descriptive names like LocationName, AreaName, and ItemName instead. Your future self will appreciate it.
Next, create AreaT. This table has its own AutoNumber primary key, AreaID. It also needs a LocationID field, which is a Number field with a Long Integer field size. That LocationID is the foreign key that tells Access which location the area belongs to. Finally, add AreaName.
For an Office location, your AreaT records might include Bookcase 1, Bookcase 2, Filing Cabinet, Desk, and Supply Closet. For the Garage, they might include Workbench, Tool Chest, Metal Shelving, and Parts Cabinet. Each area record stores the ID of its parent location.
Then create SubdivisionT. This table includes SubdivisionID as its AutoNumber primary key, AreaID as a Long Integer foreign key, and SubdivisionName. A subdivision is the next level down inside an area. Bookcases may have Shelf 1, Shelf 2, and Shelf 3. A desk could have Desktop, Left Drawer, and Right Drawer. A tool chest may have an upper tray, lower compartment, and side drawers.
Finally, create ItemT. It needs ItemID as an AutoNumber primary key, SubdivisionID as the Long Integer foreign key, and ItemName. You can add whatever other item-specific information makes sense for your situation, such as Quantity, Value, PurchaseDate, Condition, Notes, or perhaps an image filename.
If you want to associate pictures with your inventory, I generally recommend storing the image files in a normal Windows folder and saving the file path in Access. Stuffing lots of images directly into an Access database can make it grow big and sluggish in a hurry. Access is a database, not a photo album.
The key idea is that each record only needs to know its immediate parent. An item stores its SubdivisionID. The subdivision stores its AreaID. The area stores its LocationID. Access can follow that chain whenever you need to display the full address of an item.
In other words, the tape measure does not need separate fields saying Garage, Workbench, and Top Drawer. It only needs to point to Top Drawer. That drawer points to Workbench, and Workbench points to Garage. Repeating all of those names in every item record is unnecessary and leads to bad data sooner or later.
This creates three simple one-to-many relationships. One location can have many areas. One area can have many subdivisions. One subdivision can have many items. An office may contain five bookcases. Each bookcase may have six shelves. Each shelf can hold dozens of books, folders, tools, or other items.
Once you create the tables, open the Relationships window and connect LocationT.LocationID to AreaT.LocationID. Then connect AreaT.AreaID to SubdivisionT.AreaID, and SubdivisionT.SubdivisionID to ItemT.SubdivisionID. Enforcing referential integrity is usually a good idea because it helps prevent orphan records, such as an item assigned to a shelf that does not exist.
Do not worry if some locations are simpler than others. A broom closet may not really need separate areas and shelves, but this design can still handle it. You might create an area called Broom Closet and a subdivision also called Broom Closet, then place the broom, mop, and bucket in that subdivision. It may feel slightly repetitive, but it keeps the structure consistent.
Also remember that names can repeat. You might have Shelf 1 in Bookcase 1 and another Shelf 1 in Bookcase 2. That is perfectly fine. The subdivision name is just there to help humans recognize it. The SubdivisionID is what makes the record unique. Access uses the IDs to keep all those similarly named shelves straight.
One nice benefit of this design is that changes happen in one place. Suppose you rename Office to Main Office. Update the single LocationT record, and every item underneath it will automatically show the new location name in your queries and forms. You do not have to edit hundreds of books, tools, or boxes one at a time. That is exactly why relational databases exist.
Another benefit is that you can track empty spaces. An empty shelf is still a valid subdivision record. Later, you can create a query that finds subdivisions with no related items, which gives you a handy answer to the question, "Where can I put this?"
Before you start building forms and queries, enter a little sample data in each table. Do not build an entire database around empty tables if you can avoid it. Add a few locations, several areas, some subdivisions, and a handful of items. Sample records make it much easier to test relationships, build combo boxes, and see whether your design makes sense.
You also do not need to load 50,000 inventory records on day one. A few test records are enough to build and test the structure. Once the forms, queries, and relationships are working the way you want, you can import or enter the real inventory data.
The next step is to build queries that show an item's complete location path, then create forms with relational combo boxes so you can select locations and storage areas without typing IDs by hand. The full walkthrough in the embedded video demonstrates the table design and sample data setup in Access.
Keep your structure general, let each level point to its parent, and resist the temptation to create a brand-new table every time you encounter a different kind of furniture. Your inventory database will stay much cleaner, more flexible, and far easier to expand later.
Live long and prosper,
RR

No comments:
Post a Comment