Tuesday, October 6, 2026

How to Create a Navigation Form in Microsoft Access

When someone opens your Access database and immediately sees a giant list of tables, queries, forms, and reports, they may not know where to start. Worse yet, they may start opening things they should probably leave alone. A Navigation Form gives your database a proper front door: one clean screen where users can choose the task they need and get to work.
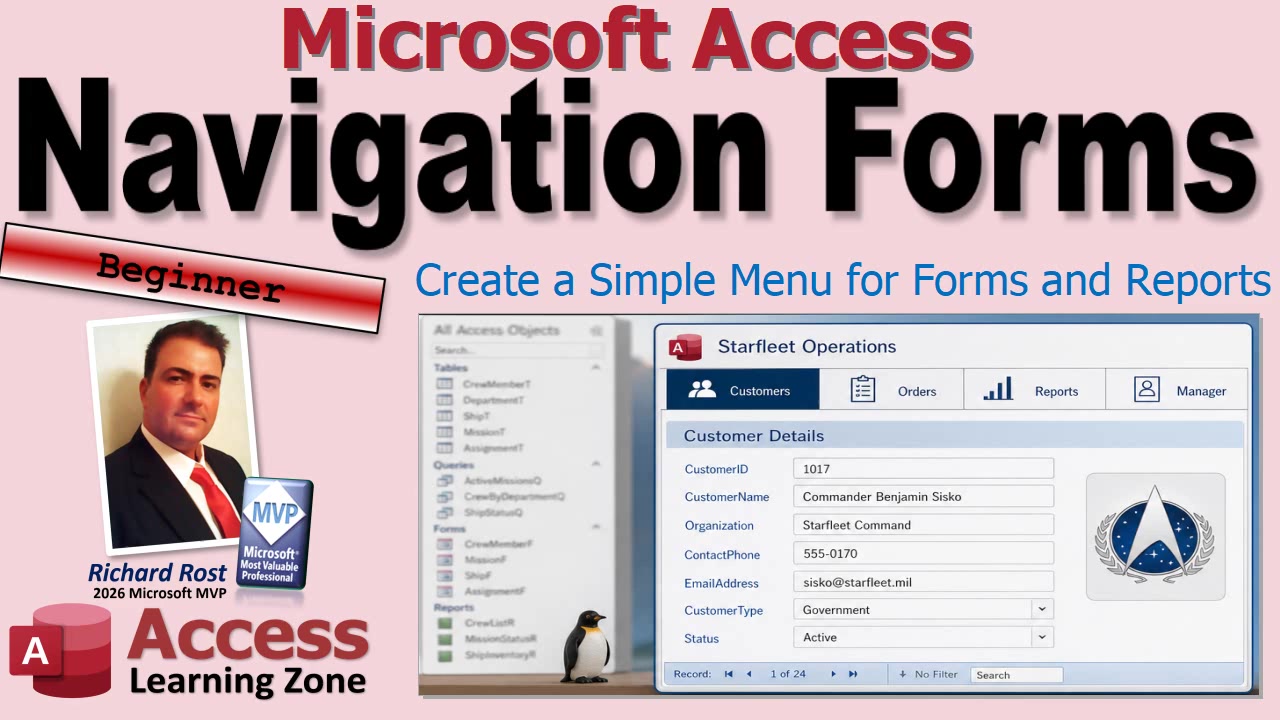
Microsoft Access Navigation Forms are one of the quickest ways to build a simple menu system without writing VBA code. They are built into Access, mostly drag and drop, and they work well for small databases or beginner projects where you want to make the database feel more like an application and less like a filing cabinet full of mysterious parts.

A Navigation Form is essentially a container form with a navigation control and a large display area. The navigation control provides tabs or menu items, and when the user clicks one, Access displays the selected form or report inside the main area of the Navigation Form.

Think of it like the table of contents in a book. Your users do not need to know where every chapter is stored or how the book was assembled. They just choose Customers, Orders, Reports, or whatever makes sense for their job, and Access takes them there.

To create one, go to the Create tab in Access. In the Forms section, click Navigation. Access will give you several different layout choices, including horizontal tabs, vertical tabs on the left or right, and two-level navigation layouts.

If you only have a few choices with short names, horizontal tabs across the top can work nicely. If you have longer labels or a larger number of items, vertical tabs may be easier to read. There is no universal best choice. Pick the layout that helps your users find what they need without making them stop and think too hard. If your menu starts looking like a packet of Chiclets, it is probably time to organize it a little better.

One of the more practical layouts is Vertical Tabs, Left. This gives you a menu area down the left side and a large workspace on the right. It is a familiar arrangement for most users, especially if you have forms with names that are longer than a couple of words.

Once the Navigation Form is open in Layout View, adding forms and reports is easy. Find the form or report you want in the Navigation Pane, then click and drag it onto the area labeled Add New in the navigation control. Access creates a navigation item for it automatically.

For example, you might drag in a Customer Form, a Contact Form, an Order Form, and a few reports. Each one becomes a selectable navigation item. Click Customer Form, and the customer form appears in the main display area. Click Contact Form, and that form replaces it.

You can also rearrange the navigation items by dragging them into a different order. This is a good time to think like your users instead of like the person who built the database. Put the things they use every day near the top. Put administrative tools, maintenance forms, and less common reports farther down the menu.

Do not be afraid to rename navigation items so they make sense to normal human beings. Your underlying object might be named something like frmCustomerList, which is fine for you, but your staff probably does not need to see that. A friendly label such as Customers or Customer List is much better.

If your database is getting larger, Access also offers two-level Navigation Forms. These let you create broad categories across the top and place related forms or reports underneath each category.

For instance, you could create a Customer Stuff category with Customer Form, Contact Form, Customer Letters, and Customer History beneath it. A separate Manager Stuff category could contain reports, order history, employee tools, or administrative forms. This can prevent a large database from turning into one long, cluttered list of tabs.

Be a little careful when dragging objects into a two-level layout. You need to drop the form or report in the correct lower navigation area for the category you want. It is easy to drop it in the wrong place and wonder why it ended up somewhere strange. Access is helpful, but it cannot read your mind. At least not yet.

After you save the Navigation Form, you can open it like any other form. Better yet, you can make it your startup form so it opens automatically when the database starts. That way, users begin with the menu instead of being dropped into the Navigation Pane with all of your tables, queries, forms, reports, and other plumbing exposed.

Keep one important point in mind: a Navigation Form is not security. Hiding the Navigation Pane and giving users a pretty menu does not stop a determined user from getting into your database objects if they have the appropriate permissions and know what they are doing. It is user-interface cleanup, not a security system. Hiding the kitchen door does not make the restaurant secure.

Navigation Forms are excellent for getting a simple interface up and running quickly. They are particularly good for beginners, small business databases, and projects where you want a clear starting point without investing time in VBA or custom menu design.

However, they do have limitations. The forms displayed in a Navigation Form are hosted inside the navigation control. From an advanced development standpoint, that means they behave somewhat like subforms. If you later start writing VBA code that refers to controls on those forms, the reference paths can become more complicated than they would be with ordinary standalone forms.

That is one reason I often prefer custom menu forms for larger or more advanced databases. A blank form with command buttons gives you much more control over the appearance, behavior, automation, and form interactions in your application. But that does not mean a custom menu is automatically better for every situation. Sometimes the simple built-in tool is exactly the right tool.

If you are building your first database interface, start with a Navigation Form. Get your forms and reports organized, make the labels friendly, and give your users one obvious place to begin. You can always replace it with a custom menu later if the database grows into something more complicated.

Watch the embedded video for a full walkthrough of creating Navigation Forms, adding objects with drag and drop, rearranging navigation items, and setting up a two-level menu layout.

Live long and prosper,
RR

Monday, October 5, 2026

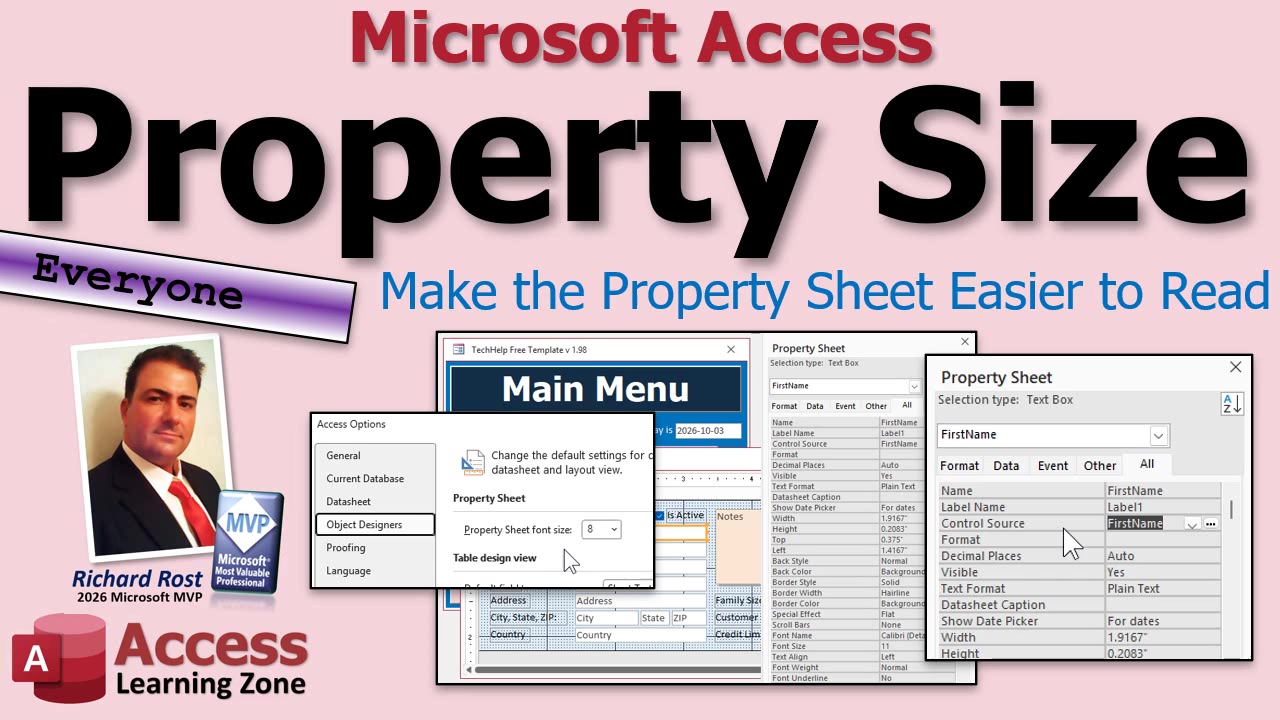
How To Make Property Sheet Text Easier To Read With Larger Font in Microsoft Access

If you spend much time designing forms and reports in Microsoft Access, you have probably noticed that the Property Sheet text can be ridiculously small. On a high-resolution monitor, the old default font size can make reading property names and values feel like an eye exam. Fortunately, newer versions of Access finally include a setting to make that text larger.

This is a simple change, but it can make a huge difference if you are working in Design View all day. It is especially helpful when you are adjusting lots of control properties, working with detailed forms, or, like many of us, discovering that your eyes are not quite as young as they used to be.

To change the Property Sheet font size, open any Access database and go to File > Options. In the Access Options window, select Object Designers from the menu on the left.

Look for the setting labeled Property Sheet Font Size. Access used to use a very small default size, commonly 8 point. Click the drop-down box and select a larger size. I find 12 point to be a comfortable choice, but pick whatever works best for your monitor, screen resolution, and eyesight.

After selecting your preferred size, click OK. Access will let you know that you need to close and reopen the database before the change takes effect. Go ahead and do that. When you open the database again and switch to Form Design View or Report Design View, bring up the Property Sheet and you should see the larger text immediately.

This setting affects the Property Sheet itself, including the property names and the values you edit. It does not make your form controls larger, change the fonts on printed reports, or magically improve the rest of the Access interface. It is specifically there to make the design-time Property Sheet easier to read.

One thing Access still could use is proper zooming in Design View. Access now has useful zoom options when viewing forms, and Ctrl plus the mouse wheel can be very handy there. But when you are placing controls precisely in Design View, especially on a large high-resolution display, it would be nice to have that same kind of zoom control. Maybe someday. We can dream.

Until then, Windows includes a built-in workaround: Magnifier. Press the Windows key and the plus key to turn it on and zoom in. Press the Windows key and the minus key to zoom back out. This is useful when you need to line up controls, resize something by a few pixels, or read a tiny bit of text without changing your Access settings permanently.

If you use Windows Magnifier often, consider assigning those keyboard shortcuts to a programmable keypad or Stream Deck. It is not required, of course, but having one button to zoom in and another to zoom out is a lot easier than remembering keyboard combinations while you are trying to nudge a textbox into the exact right spot.

The larger Property Sheet font setting is one of those small quality-of-life improvements that can make working in Access much less frustrating. If you have been squinting at 8-point property text for years, give 12 point a try. Your eyes will thank you.

Watch the embedded video for a quick visual walkthrough of the setting and a demonstration of Windows Magnifier in action.

Live long and prosper,
RR

Friday, October 2, 2026

Which Combo Box Column Gets Selected Commission Rate in Microsoft Access? Video Quiz D2.3

Combo boxes are one of those Access controls that seem simple right up until you need to pull a value from a column that is not the bound column. Then suddenly you are staring at Column(3), wondering whether Access counts like a normal human being. Spoiler alert: it does not. Combo box columns are zero-based.

This Developer Level quiz covers five useful VBA and form-validation concepts: retrieving the correct combo box column, converting text to numbers, distinguishing Null from zero, opening a combo box when validation fails, and returning validation results from a reusable function. Give yourself a few seconds to answer each question before checking the answer.

Question 1: A combo box Row Source contains ID, FirstName, LastName, and CommissionRate, in that order. Which expression retrieves the CommissionRate from the selected row?

A. cboEmployee.Column(4)
B. cboEmployee.Column(2)
C. cboEmployee.Column(3)
D. cboEmployee.Column("CommissionRate")

Answer: C. cboEmployee.Column(3)

Access combo box columns start counting at zero. That means ID is Column(0), FirstName is Column(1), LastName is Column(2), and CommissionRate is Column(3). The fourth field is therefore Column(3). This catches almost everybody at least once, usually while they are wondering why they are getting a last name instead of a commission percentage.

Question 2: A numeric value from a combo box column is being treated as text. Which VBA function can commonly convert a numeric string into a number before performing calculations?

A. Val()
B. Format()
C. CStr()
D. MsgBox()

Answer: A. Val()

The Val() function takes the numeric portion of a text value and converts it into a number. That can be helpful when a combo box column gives you something that looks like a number but VBA insists on treating it as text. On the other hand, Format() and CStr() are generally used when you want to create text, which is exactly the opposite direction from where you are trying to go.

Question 3: Why should validation code test whether a numeric input is Null instead of automatically rejecting zero?

A. Zero cannot be stored in a numeric Access control.
B. Null means no value was entered, while zero may be a legitimate entered value.
C. Null and zero always mean the same thing in VBA.
D. Testing for zero prevents the control from receiving focus.

Answer: B. Null means no value was entered, while zero may be a legitimate entered value.

Null means no value has been supplied. Zero is an actual numeric value. Whether zero is valid depends on your business rules. A quantity of zero, a discount of zero percent, or even a commission rate of zero may be perfectly acceptable. Your validation routine should reject missing information when information is required, not reject a valid number just because it happens to be zero.

Question 4: VBA needs to open a combo box drop-down after detecting that the user has not selected a value. What should the code normally do before calling the combo box's DropDown method?

A. Save the current record with DoCmd.RunCommand.
B. Requery the combo box Row Source.
C. Set focus to the combo box.
D. Change the combo box Bound Column to zero.

Answer: C. Set focus to the combo box.

A control generally needs to have the focus before VBA can use certain methods on it, including DropDown. So the usual logic is to move the focus to the combo box and then open its list. That gives the user a helpful little nudge toward fixing the problem instead of merely throwing a message at them and leaving them to hunt around the form.

Question 5: A form has several required controls that must be validated before calculating a result. Which design best lets one reusable VBA routine tell the calling code whether every validation test passed?

A. Use a Sub procedure that displays messages but returns nothing.
B. Use a Function As Boolean that returns False when a test fails and True only after all tests pass.
C. Put every validation rule in a table Validation Rule property.
D. Use On Error Resume Next and calculate the result anyway.

Answer: B. Use a Function As Boolean.

A Boolean validation function gives the rest of your code a simple yes-or-no answer. If a required field is missing, the function can display the appropriate message, set focus to the control, and return False. If every check passes, it returns True. Then your calculation code can continue only when validation succeeds. It keeps your forms cleaner, makes the validation routine reusable, and prevents your button-click event from turning into a 200-line bowl of spaghetti.

If you missed any of these, do not put yourself on trial for crimes against VBA. These are all common Access development issues, especially when you start using combo boxes for lookup values and calculations. Watch the embedded video for the quiz and a quick review of each answer.

Live long and prosper,
RR

Build Multi-Select Combo Filters with AND/OR Logic in Microsoft Access

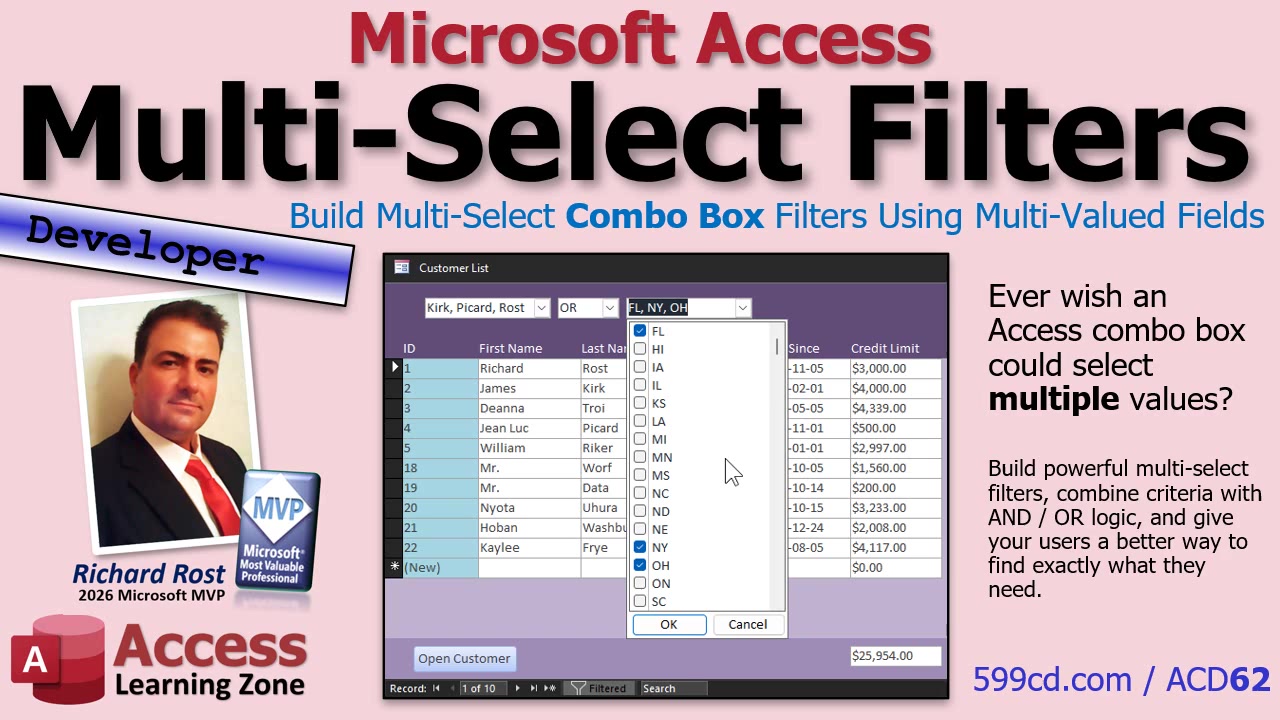
Wouldn't it be nice if your users could pick Florida, New York, and Ohio from one filter, choose a couple of last names from another, and then decide whether those filters should work together with AND logic or separately with OR logic? Access does not give you a true multi-select combo box out of the box, because apparently that would be too convenient. But you can build one.

This is the kind of feature that makes a database feel much more polished. Instead of forcing users to run several searches, type complicated criteria, or settle for filtering one value at a time, you can let them choose several values and apply all of those selections at once.

For example, imagine a customer list where someone wants to see every customer in Florida and New York. They select both states, click OK, and the form displays only matching records. Add another filter for last name, select Riker and Ross, and now you can decide whether the records must match both filter groups or either group.

That distinction matters. With AND logic, the result must satisfy every active filter. A customer would need to be in one of the selected states and have one of the selected last names. With OR logic, a record can match either group. It can be someone from Florida or New York, or someone named Riker or Ross.

The trick is not really making a standard combo box suddenly support multi-select behavior. Access combo boxes do not natively work that way. The solution is to create an interface that lets the user build a collection of selected values, then use VBA to turn those selections into filter criteria behind the scenes.

Each filter control represents a field you want to search, such as State, City, LastName, ProductCategory, Employee, or OrderStatus. The selected items are gathered by VBA and converted into a condition appropriate for that field. Multiple state selections become one condition, multiple last-name selections become another condition, and then the final filter combines those conditions using AND or OR logic.

The important part is that the criteria must be built carefully. Text values need to be treated as text, apostrophes inside data need to be handled properly, date values need date delimiters, and numeric values should not be wrapped in quotes. This is one of those areas where dynamic filtering can go from "wow, that worked beautifully" to "why is Access yelling at me?" if the criteria are not constructed correctly.

You also need to account for filters that have no selections. If the user has selected states but left the last-name filter empty, the state condition should be used by itself. Empty controls should not produce broken expressions, extra AND operators, or criteria that accidentally return no records. That is the sort of housekeeping VBA is very good at once you set up the logic properly.

Another nice benefit is that the same general technique can be reused all over an Access application. You are not limited to customer lists. You can use it for product searches, employee assignments, invoices by status, orders by category, cities within selected states, or just about any other field where users might reasonably want more than one choice.

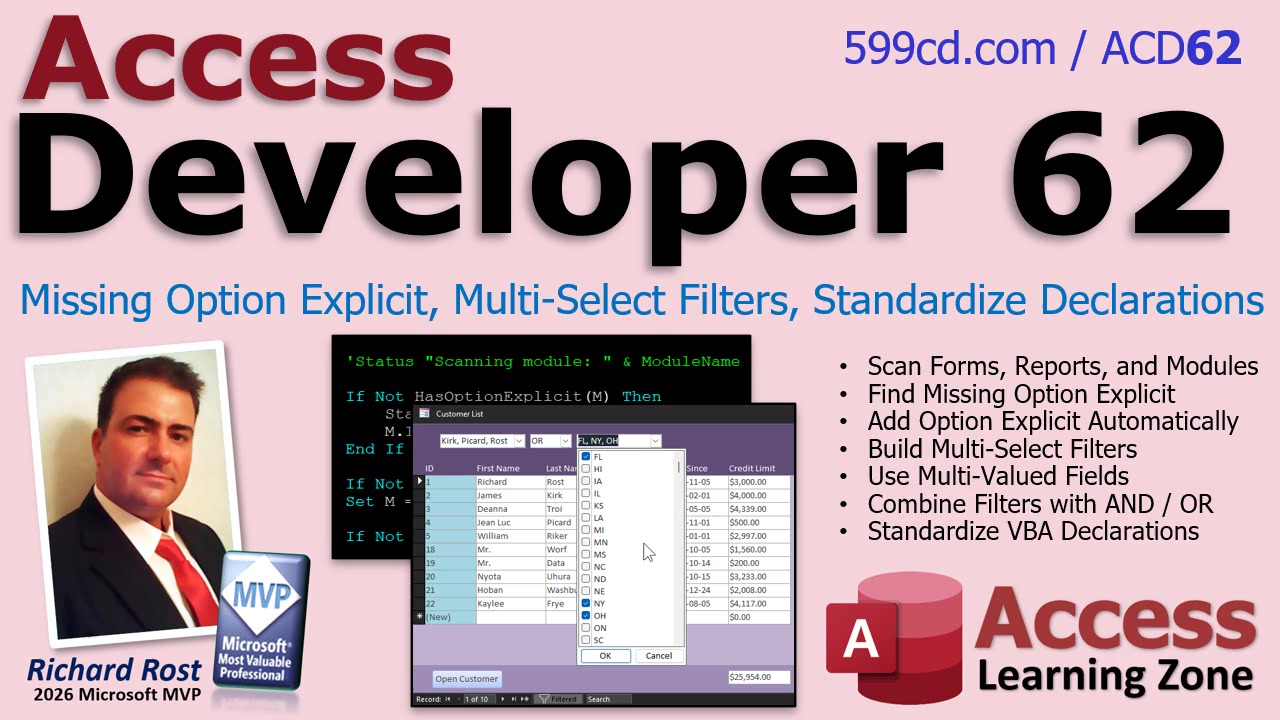
In Access Developer 62, I build this type of multi-select filtering system from scratch. We work with the selected values in VBA, create the filter criteria dynamically, and combine multiple filter groups with AND and OR logic. The goal is not just to make one fancy customer filter, but to give you a technique you can adapt for your own databases.

If your users are constantly asking, "Can I pick more than one?" this is a feature worth adding to your toolbox. Watch the embedded video for a preview of how the finished filters behave, and visit the course page for the complete hands-on lesson and implementation details.

Live long and prosper,
RR

Thursday, October 1, 2026

How to Scan VBA for Option Explicit and Create Multi-Select Filters in Microsoft Access

One misspelled VBA variable can waste an embarrassing amount of time. Access will happily create a brand-new Variant variable for you if Option Explicit is missing, and then you get to spend the afternoon wondering why your perfectly good code is acting like it was written by a caffeinated raccoon. Developer Level 62 focuses on finding and fixing that kind of problem across an entire database, along with building a very handy multi-select filtering interface for your forms.

This is a developer-level class for Access users who are already comfortable working with VBA and want some practical tools they can use in real databases. The projects are different on the surface, but they share a useful theme: programmatically inspecting, modifying, and improving the stuff that already exists in your Access application.

The first project is a VBA maintenance tool that scans your database for modules that are missing Option Explicit. That includes standard modules, form modules, and report modules. If you have inherited an older database, or you have been maintaining the same application for years, there is a good chance that some code has accumulated in places you have not looked at recently.

Option Explicit forces every variable to be declared before it can be used. Without it, a typo such as CustomerNmae instead of CustomerName may compile just fine. VBA assumes you intended to create a new variable, usually a Variant, and your code keeps running with bad data or unexpected behavior. Those are the bugs that make you stare at the screen for half an hour before realizing you transposed two letters.

Rather than opening every module by hand and checking declarations one at a time, the class shows how to inspect the VBA project programmatically. The goal is not merely to produce a report saying, "Yep, you've got problems." The tool can identify missing declarations and automatically correct them. That makes it especially useful as a cleanup utility before deploying an older database or handing it off to another developer.

We also take the idea a step further by standardizing both Option Compare and Option Explicit throughout the project. Option Compare can affect how text comparisons behave, so the objective is not to blindly overwrite whatever is there. The important part is preserving each module's existing comparison setting while making sure the declarations are consistently placed and formatted.

This leads into a very useful programming lesson: safely modifying a collection of items when your modification can change their position. Lines of code move when you insert or remove text. If you are scanning through a module line by line and changing the module as you go, you have to account for that movement or you can skip lines, process the wrong line, or otherwise create a mess. It is one of those little details that separates "it worked on my test module" from reliable developer tooling.

The second major project is completely different, but just as practical: creating multi-select filter combo boxes in Microsoft Access. Access does not provide a traditional multi-select combo box control. You can use a list box, of course, but sometimes you want the compact appearance and familiar behavior of a drop-down control.

The technique in this class uses a feature I normally discourage for relational data storage: multi-valued fields. In a properly normalized relational design, multi-valued fields are usually more trouble than they are worth. They complicate queries, reporting, imports, exports, and long-term maintenance. But for a temporary user-interface selection tool, they can be surprisingly useful.

Instead of storing business data in a multi-valued field, we use the field as a convenient way for the user to choose several filter values from a drop-down. Those selections can then be used to build criteria for a form filter. This gives users a much friendlier way to say, "Show me records from these three categories," without requiring a giant list box sitting on the form.

The class also covers combining more than one multi-select filter. That is where the technique becomes especially useful. You can let users select several values from one filter and several values from another, then decide whether the final result should use AND logic, OR logic, or a combination of both. For example, users might select multiple departments and multiple employee statuses, then filter the form based on the relationship between those selections.

The important point is that the filtering controls are for finding records, not for defining your database structure. Used that way, multi-select selections can make a busy form much easier for users to work with while keeping the actual data model sane. That's a compromise I can live with.

Developer Level 62 brings these ideas together into useful real-world skills: scanning and cleaning VBA modules, enforcing better coding standards, safely editing code through automation, and building a slick filtering interface that your users will actually appreciate. If you work with established Access databases, especially ones that have grown organically over the years, these are excellent tools to have in your toolbox.

Watch the embedded video for an overview of the projects and demonstrations of what the finished tools can do. When you're ready for the complete step-by-step training, visit the course page for Microsoft Access Developer Level 62.

Live long and prosper,
RR

Can a Microsoft Access Macro SetValue Use Back Style Text Values? Video Quiz A3.2

Time for a quick Access quiz. These five questions cover a handful of small but important details involving form properties, macros, control events, fonts, and section references. They are exactly the kinds of things that can trip you up when everything looks fine in the Property Sheet, but your macro suddenly decides to throw a tantrum.

Give yourself a few seconds for each question before reading the answer. No cheating. Well, very little cheating. If you get all five, congratulations: your Access skills are operating at peak desktop nirvana.

Question 1: When a macro changes a control's Height or Width property, what unit does Access use?

A. Screen pixels
B. Twips
C. Inches
D. Points

Answer: B. Twips. Access uses twips for measurements such as a control's Height, Width, Top, and Left properties. There are 1,440 twips in one inch. The Property Sheet may display measurements in inches depending on your settings, but the actual property value used in expressions and macros is typically in twips. If you are not sure what number to use, check the current property value and work from there.

Question 2: You want a notes text box to expand while the user is editing it and return to normal afterward. Which event setup is most appropriate?

A. Expand it in On Click and shrink it in On Double Click
B. Expand it in On Load and shrink it in On Close
C. Expand it in On Got Focus and shrink it in On Lost Focus
D. Expand it in Before Update and shrink it in After Update

Answer: C. Expand it in On Got Focus and shrink it in On Lost Focus. Got Focus fires when the user enters the control, whether they click in it or tab into it. Lost Focus fires when they move away. That makes these events perfect for a temporary zoom effect on a notes box or any other field where the user may need a little extra room to work.

Using Click is a common beginner mistake because it seems like it should work. But Click only catches mouse activity. A user who tabs into the control would miss it entirely. Got Focus handles both situations without making you build separate logic for each.

Question 3: Why is it usually best to use a common Windows or Office font when setting a control's Font Name in an Access application?

A. A missing custom font can produce unreliable or substituted results on another computer
B. Access can assign Font Name only to labels, not text boxes
C. Custom fonts can be used only in reports
D. Font names must always be numeric values

Answer: A. Access can request just about any installed font, but that font has to exist on the computer running your database. If it does not, Windows may substitute another font, and suddenly your carefully aligned form looks like it was assembled during a power outage.

For databases that will be shared with other users, stick with common fonts such as Calibri, Arial, Tahoma, or Times New Roman. Tahoma remains one of my personal favorites. It is clean, readable, and unlikely to disappear when your database gets copied to someone else's machine.

Question 4: A macro uses SetValue to change a text box's BackStyle. Why can assigning the text "Normal" cause an error?

A. BackStyle can be changed only in VBA
B. SetValue can modify only bound fields
C. BackStyle must be assigned a color expression such as RGB()
D. BackStyle uses a numeric property value rather than the displayed word

Answer: D. The Property Sheet often displays friendly labels, but not every property is actually stored as text. BackStyle is numeric: Normal is 1 and Transparent is 0. A macro using SetValue needs the underlying numeric value, not the word shown in the drop-down list.

This is one of those Access details worth remembering. The Property Sheet is designed for humans. Macro expressions have to work with the actual value Access expects. If a property setting looks like a word but refuses to cooperate in SetValue, check whether it is really an enumeration or numeric setting hiding behind a friendly label.

Question 5: In a macro, which reference targets the BackColor of the Detail section on an open form named CustomerF?

A. Forms!CustomerF.BackColor
B. Forms!CustomerF!Detail.BackColor
C. CustomerF!BackColor
D. Forms!Detail!CustomerF.BackColor

Answer: B. Forms!CustomerF!Detail.BackColor. You start with the Forms collection, identify the open form, then identify the Detail section, and finally specify the property you want to change. The visible background area of most forms is the Detail section, so that is usually the BackColor property you are looking for.

There are often multiple valid ways to refer to objects in Access, especially when you are working inside a form module or form-level macro. But when you need a fully qualified reference to an open form's Detail section, Forms!CustomerF!Detail.BackColor is the clear and reliable choice.

So, how did you do? If you missed a couple, do not worry. These are not huge concepts individually, but they are the little nuts and bolts that make Access forms and macros behave properly instead of acting like a Windows 95 machine trying to dial into the Internet.

These topics and plenty more are covered in Access Advanced Level 3, Lesson 2. Watch the embedded video for the quiz and explanations, then check out the course if you want to dig deeper into form properties, macros, events, and making your Access applications a lot more polished.

Live long and prosper,
RR

Wednesday, September 30, 2026

What Does the SQL Asterisk Mean in a Microsoft Access SQL Select Query? Video Quiz X3.1

Think you know your Access SQL? Here is a quick five-question quiz covering some of the basics that every serious Access developer should have down cold: SELECT, FROM, WHERE, ORDER BY, field order, and that little asterisk that seems harmless until it comes back to haunt you.

Give yourself a few seconds to answer each question before checking the answer. No peeking. This is the honor system, and Access knows when you lie. Probably.

Question 1: Which SQL clause is used to sort the records returned by a query?

A. WHERE
B. ORDER BY
C. FROM
D. SELECT

Answer: B. ORDER BY

The ORDER BY clause controls the order in which records appear in your query results. For example, you might sort customers by LastName, invoices by InvoiceDate, or products by Price. It does not change the records in the table. It only changes how Access displays the results.

Question 2: What does the asterisk mean in this SQL statement: SELECT * FROM CustomerT;

A. Return all fields from CustomerT
B. Return only records with an ID value
C. Sort the records alphabetically
D. Return only calculated fields

Answer: A. Return all fields from CustomerT

The asterisk is essentially SQL shorthand for "give me all available fields." So SELECT * FROM CustomerT returns every column from CustomerT.

This can be convenient while you are experimenting or quickly looking at table data. However, in real-world queries, I generally prefer listing the fields I actually need. It makes the query easier to read, avoids returning unnecessary data, and prevents surprises if somebody later adds a new field to the table.

Question 3: What is the purpose of a WHERE clause in a SELECT query?

A. It changes the names of fields in the table
B. It determines the order of returned columns
C. It limits the records returned to those meeting a condition
D. It permanently deletes records that do not match

Answer: C. It limits the records returned to those meeting a condition

The WHERE clause is where you put your criteria. If you only want customers in New York, unpaid invoices, active employees, or orders placed this month, WHERE is what narrows down the records.

A SELECT query with a WHERE clause does not delete anything. It simply shows you the records that meet your condition. SQL can certainly delete records, but that requires a DELETE query, which is a whole different animal and one you should approach with appropriate respect and possibly a backup.

Question 4: In a SQL Row Source for a combo box, what determines the order of the columns returned by the query?

A. The order of fields in the source table design
B. The field used in the ORDER BY clause
C. The order in which fields appear after SELECT
D. The combo box's Tab Order property

Answer: C. The order in which fields appear after SELECT

This one catches a lot of people. ORDER BY controls the order of the records, vertically down the list. The fields after SELECT control the order of the columns, horizontally across the query.

That matters a lot with combo boxes. If your Row Source begins with CustomerID and then FullName, the first returned column is CustomerID and the second is FullName. Your Bound Column and Column Width settings depend on that sequence. Rearrange the SELECT list, and you may suddenly bind the wrong value without realizing it. Fun times.

Question 5: Assume every field comes from CustomerQ and none of the field names contain spaces. Which edit can shorten this SQL without changing its results?

SELECT [CustomerQ].[CustomerID], [CustomerQ].[FullName] FROM CustomerQ;

A. Remove CustomerID from the SELECT list
B. Remove the FROM CustomerQ clause
C. Replace SELECT with ORDER BY
D. Remove the CustomerQ prefixes and square brackets

Answer: D. Remove the CustomerQ prefixes and square brackets

If every field in the query comes from the same source, Access can usually identify the fields without repeating the table or query name in front of each one. And if the field names are simple names without spaces or special characters, brackets are optional too.

So the shorter version can simply be: SELECT CustomerID, FullName FROM CustomerQ;

There are times when table prefixes and brackets are important. Prefixes are especially useful when joining tables that have similarly named fields, and brackets are necessary when names contain spaces or reserved words. But when they are not needed, removing the clutter makes your SQL much easier to read.

If you got all five right, congratulations, you have successfully navigated the SQL energy cloud. If not, no worries. These are exactly the kinds of little SQL details that become second nature once you start building more queries, forms, combo boxes, and reports in Access.

Watch the embedded video if you want to take the quiz along with the timer. These SQL topics and plenty more are covered in Access Expert Level 3, Lesson 1.

Live long and prosper,
RR